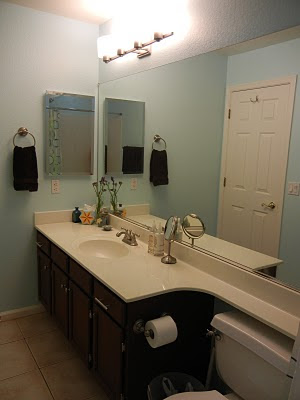
I had ordered an extra long 96" shower curtain and had plans to raise the shower curtain as soon as it arrived. Well, about an hour after my last post the curtain was delivered! I was a little anxious because I wasn't sure that the colors would mesh well. After all, I had purchased it online (extra long shower curtains are rarely available in stores... especially a 96" one) and you can never be too sure about what's going to be showing up on your doorstep. I aimed at not being too "matchy-matchy" for fear of being too boring so the colors are similar- but not the same. And thankfully, what arrived is PERFECT!
Here's what the bathroom now looks like with the new "high-rise" shower curtain:
 Why did I choose to raise the shower curtain? Well, I understand that it isn't everyone's cup-o-tea, but I have to say that I feel like it adds some dramatic height and a shot of luxury to the room. I really wanted this bathroom to be relaxing with a hotel feel (since this acts as a guest bath when we have them) and also wanted it to be a place for me to unwind (this is our only bathroom with a tub and I love me some bubble baths).
Here's a shot of the curtain with the wall color and new chocolate towels that I snagged:
 See what I mean? The blue on the curtain is a bit darker while the browns are a bit lighter. It all still pulls together without being too bland. I also love the simple pattern on the curtain... it's not so busy that it hurts your eyes!
Here are a few other details that I added to complete the transformation:
 This votive wall sconce has been in my possession for a while- in fact it used to be black. But I got spray-paint-happy and painted it silver a few months ago but couldn't figure out where I wanted it. Problem solved- placing it over the towel rack balances out that giant void of wall space while at the same time contributing to the spa feel :)
 These are what will be our guest towels (as soon as we get our next guests) which I snagged on the cheap at Kohls ($4 each for over-sized towels? Yes please!).
Side-note: When I bought these I totally imagined how Monica Geller I felt. Anyone else remember the episode where the guys are quizzed on how many towel categories she has? Well, I only have four... so I guess I'm not as OCD as she was. Anyhow, off of my towel tangent and back to the bathroom reveal.
 I picked up this fun little "one-of-a-kind" dish at a fun shop in Long Beach. I take off my rings when I wash my hands (I hate the feel of water under them) but always felt freaked out about just putting them on the counter. What if they fell down the drain? Problem solved. I bought three of these dishes in different colors: one for each bathroom and one for by the kitchen sink.
 Last but not least is this little doozy. This has actually been in our bathroom for a few months now. My parents bought us this as a fun gift for Christmas- a kitty toilet flusher! Fun huh?
So that's the bathroom reveal! With the exception of a bath mat and a new toilet lid this room is DONE!


